67834399CC708646102FF78944E110NN.xyz
Creating a Blog Site using Astro + Vue and Cloudflare
Create a blazingly fast blog site using Astro, Vue, and Cloudflare
Introduction
I recently purchased the domain 677078.xyz for some development stuff. I mainly use it for personal/internal applications, but I don't want to keep the root domain empty. Instead, I decided to build a personal blog in it.
I have used both Next.js and Nuxt.js before, so I wanted to try something different this time. Astro caught my attention because of its islands architecture and its ability to use multiple UI frameworks, such as Vue and React, in the same project without shipping unnecessary client-side JavaScript.
My goal is a beautiful but fast public blog site, with a fully featured admin interface for writing posts. I also want to write my blog like how I write in Obsidian, because I've been using it for a couple of years now and I can't live without Obsidian-flavored Markdown support anymore.
The first few designs of the site was not perfect. I made several errors along the way. In this article, I will tell you how I designed, built, broke, and fixed the site.
Creating the Landing Page
I bought 677078.xyz because if you convert the ASCII letters C, F, and N into DEC, it would result in 67, 70, and 78, respectively, and CFN stands for my username "ChrisFromNowhere".
So to follow on this idea, I decided to make the site reflect a terminal-inspired design without making it look like the generic neon-green themes we frequently see.
I spent my time at a color generation website and pressed randomize until I found the colors that I like. Of course, I did some manual adjustments to get what I actually want. I love my JetBrains Mono, but I don't want to use the same font everywhere. I saw Maple Mono get suggested a few weeks ago on a social media site and I like how it looks, so I settled with it.
I created the landing page as a pure server-rendered Astro component so that it will serve the first page quickly. I thought the learning curve for Astro is comparable to Next.js but it felt like it's even easier than Nuxt.js. One thing that entertained me the most in the landing page is the AsciiTitle.astro component that renders the DEC -> ASCII logo. It's basically a bunch of <div>s that translate vertically in a staggering animation. This animation does not make the page load slower as it uses only HTML and CSS.
<div class="title-wrapper" id="title-wrapper">
    <h1 class="domain-title" id="domain-title">
        <!-- 67 > C -->
        <div class="slot-container pair-1" data-slot="1">
            <div class="slot-reel">
                <div class="slot-item num-state">67</div>
                <div class="slot-item intermediate">83</div>
                <div class="slot-item intermediate">43</div>
                <div class="slot-item intermediate">99</div>
                <div class="slot-item intermediate">C</div>
                <div class="slot-item char-state">C</div>
            </div>
        </div>
        <!-- ... -->
    </h1>
    <!-- ... -->
</div>
/* When converted to ascii, the reel translates to the bottom character */
.title-wrapper.is-ascii .slot-container .slot-reel {
transform: translateY(-83.3333%);
}
/* Staggered transition delays for slot reel */
.title-wrapper.is-ascii .pair-1 .slot-reel {
transition-delay: 0.0s;
}
.title-wrapper.is-ascii .pair-2 .slot-reel {
transition-delay: 0.12s;
}
.title-wrapper.is-ascii .pair-3 .slot-reel {
transition-delay: 0.24s;
}
/* Staggered width contractions */
.title-wrapper.is-ascii .pair-1 {
transition-delay: 0.2s;
}
.title-wrapper.is-ascii .pair-2 {
transition-delay: 0.32s;
}
.title-wrapper.is-ascii .pair-3 {
transition-delay: 0.44s;
}The header contains two buttons: Theme and Animation toggles. ThemeToggle.astro switches between dark and light themes with preference persistence in localStorage, while AnimationToggle.astro allows visitors to turn off the fancy CSS transitions.
Finally, I got this landing page.
Adding, Editing, and Deleting Posts
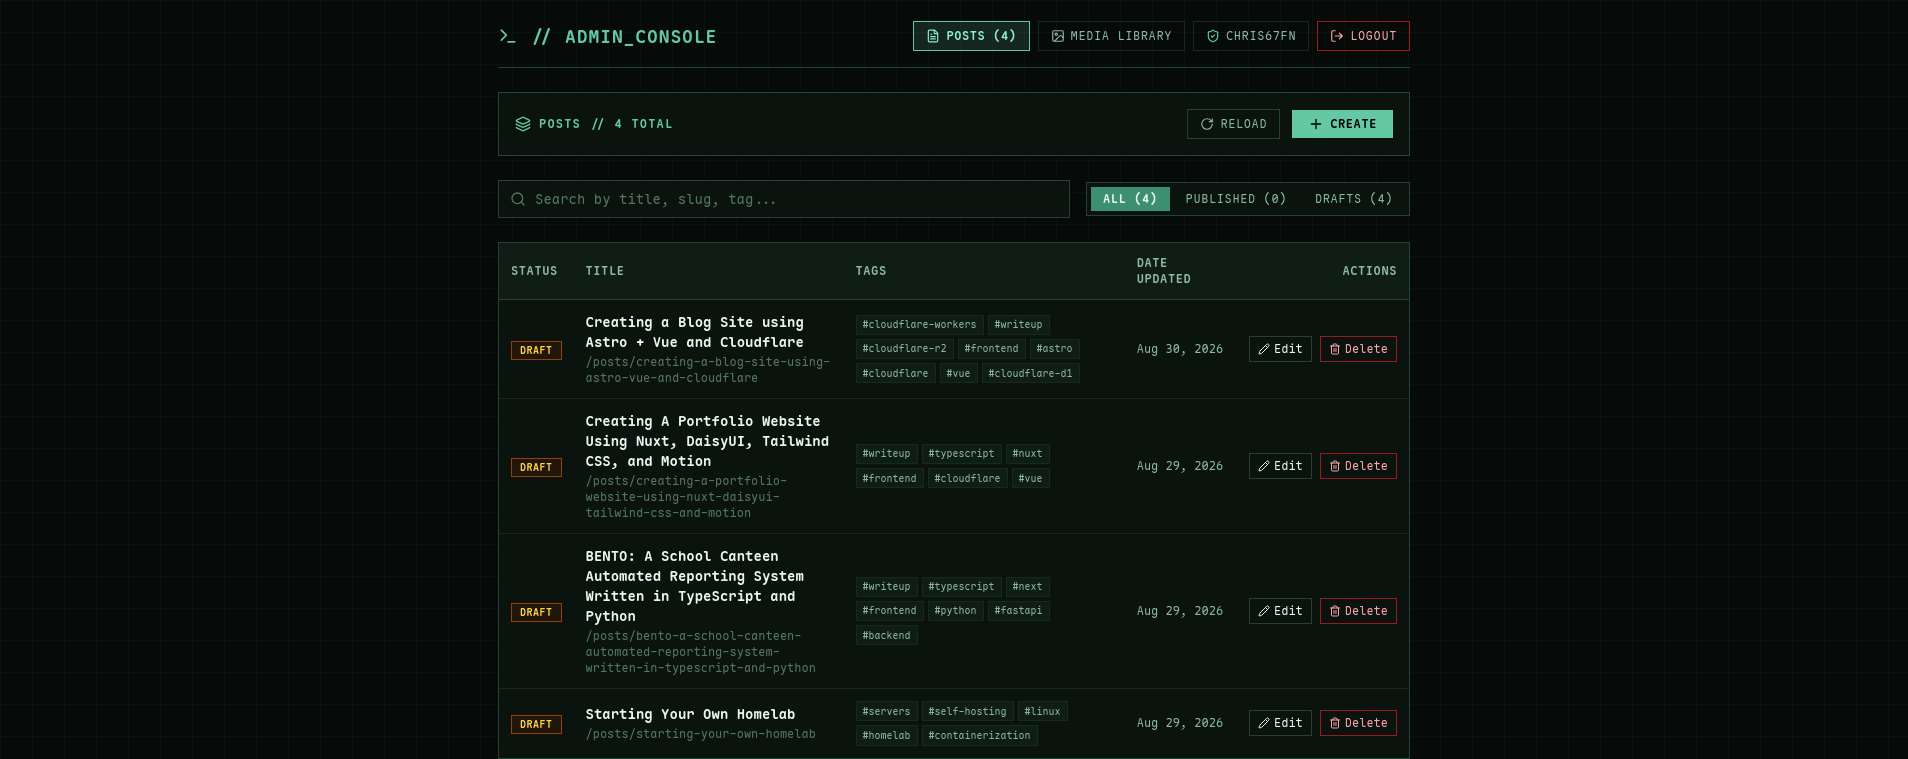
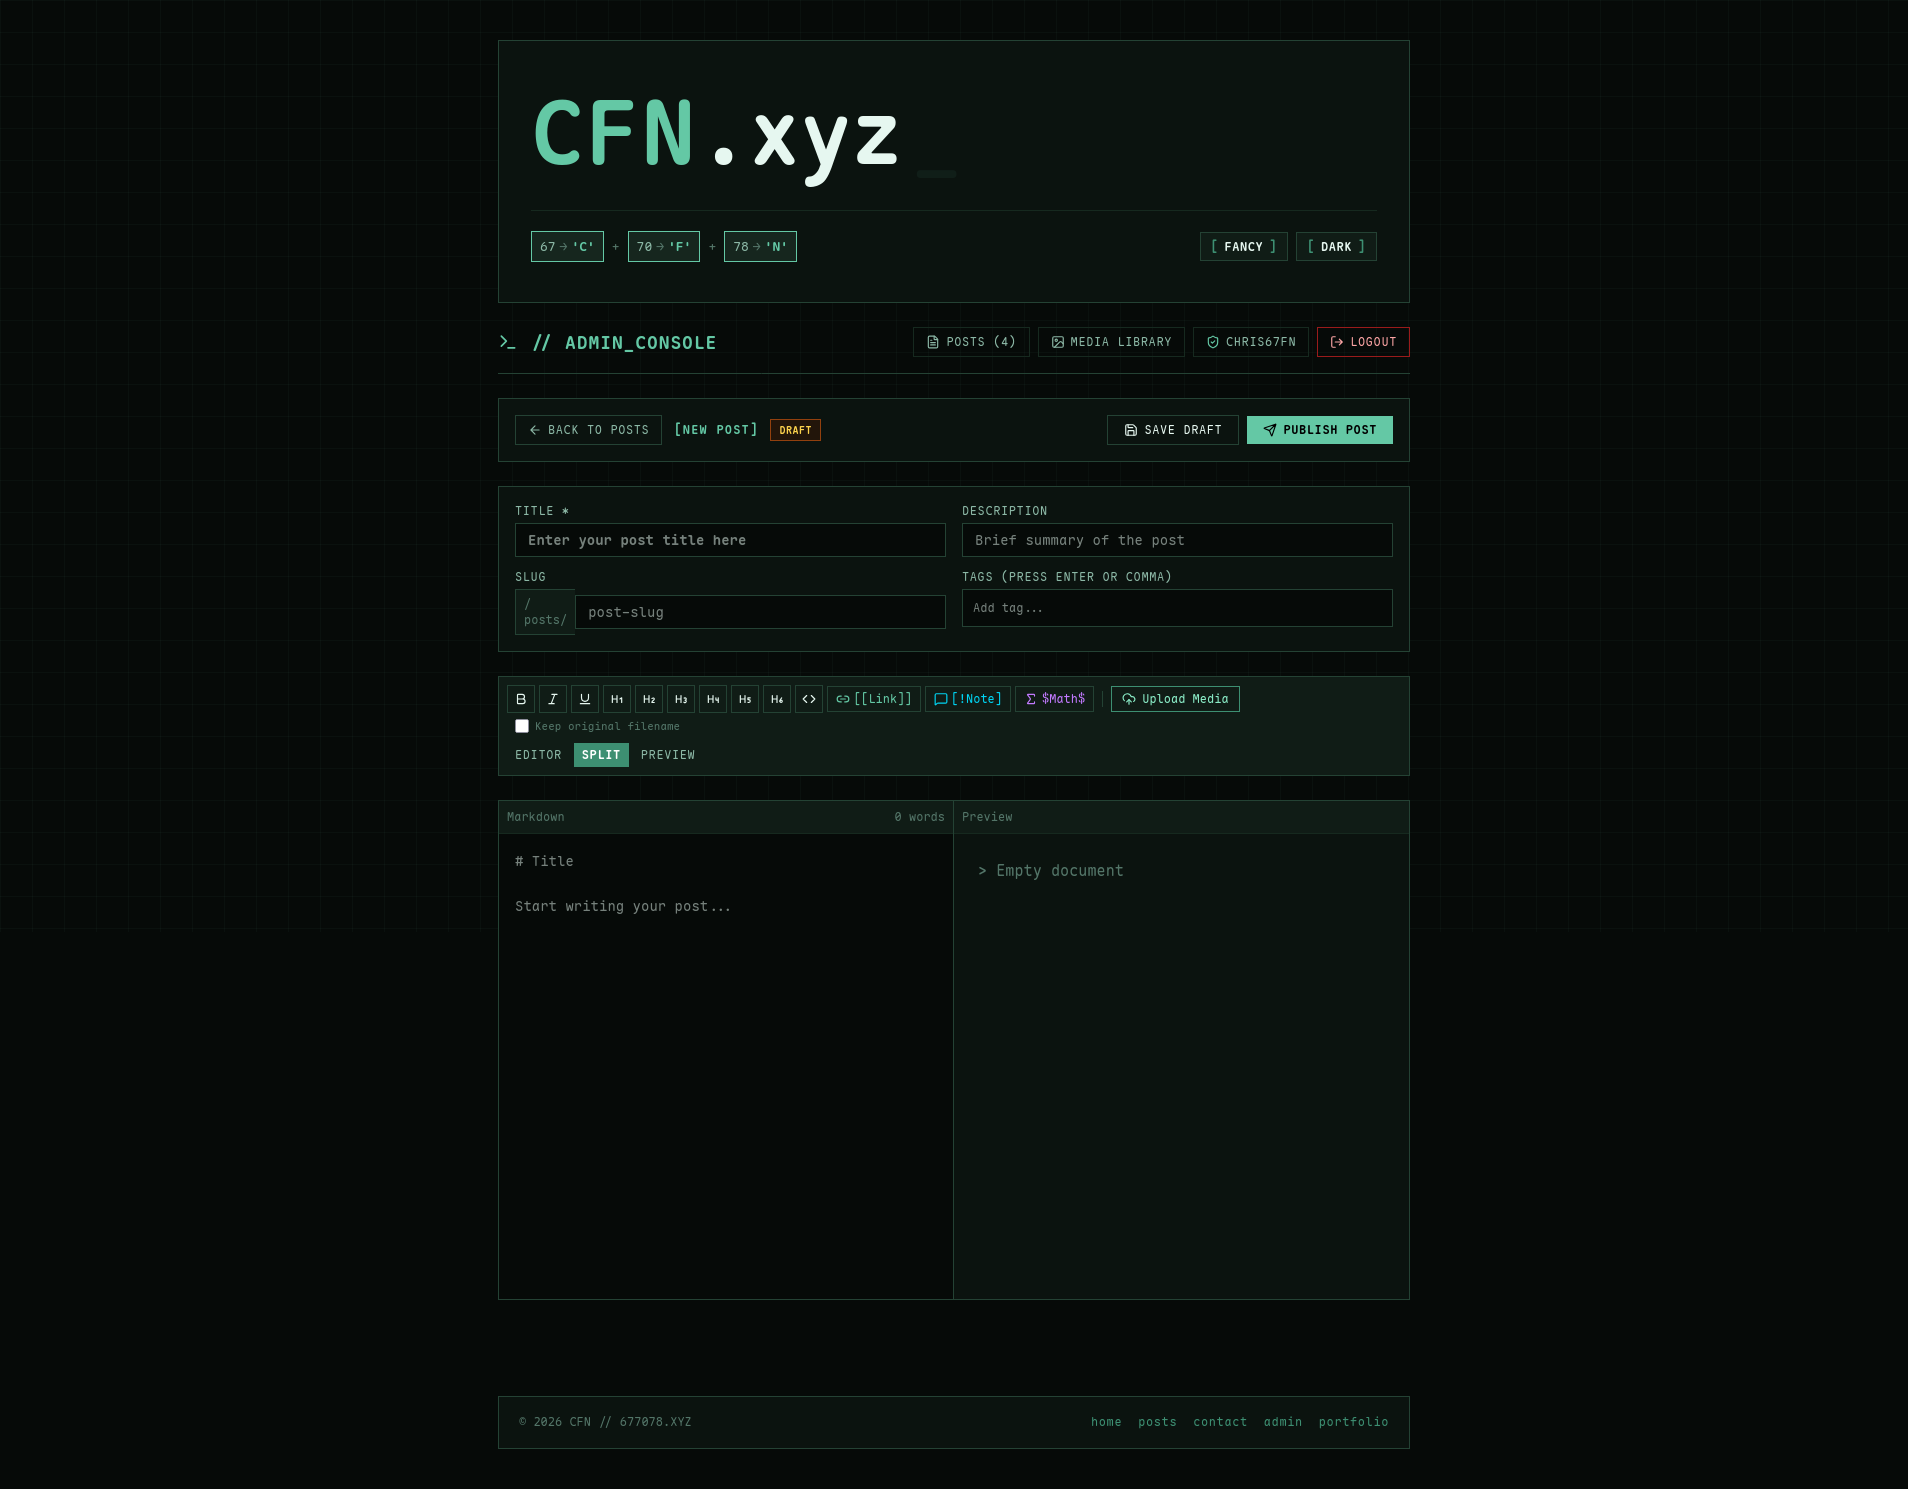
The administration dashboard is a single-page application written in Vue, mounted inside src/pages/admin.astro. It presents the admin (me) with all the published and drafted posts, and allows me to edit or delete them.
Building the Obsidian-Flavored Markdown Parser
Because I am used to writing my notes in Obsidian, I wanted to transfer that workflow into my blog site. Obsidian uses their own flavor of Markdown called Obsidian Flavored Markdown. This is a mix of CommonMark, GitHub Flavored Markdown, and LaTeX. When searching the web, I wasn't able to see any available parsers for Obsidian Flavored Markdown, so I built a custom module using unified, remark-parse, remark-gfm, and remark-rehype.
Comments, Highlights, Wikilinks, and Embeds
The remarkObsidianLinks() plugin traverses text nodes in two passes. First, it removes Obsidian comments (%%...%%) directly from text nodes so we don't have to deal with them in the future.
// 1. Strip Obsidian comments %%...%%
visit(tree, "text", (node) => {
    if (node.value.includes("%%")) {
    node.value = node.value.replace(/%%[\s\S]*?%%/g, "");
    }
});
Next, it uses a single regular expression to match highlights (==text==), embeds (![[file]]), and wikilinks ([[post]]):
const pattern = /(!?)\[\[([^\]|]+)(?:\|([^\]]+))?\]\]|==([^=]+)==/g;Obsidian embeds use ![[filename.ext]] for media files. Instead of treating all embeds as standard image tags, the parser inspects the file extension and converts it into the appropriate component:
- Images are converted to
<img loading="lazy" />pointing to/media/{filename}. Sizing parameters like![[photo.png|300]]or![[photo.png|300x200]]are converted into inline CSS styles. - Videos are served with a custom player UI.
- Audio files are rendered with custom player UI, just like videos. Track filename display and scrubbable progress bar are also added.
- PDFs are embedded directly via an
<iframe>viewer. - Other files are styled with an attachment button and a download attribute.
Callouts
Obsidian callouts use the blockquote syntax:
> [!NOTE] Custom Title
> Callout body

> [!WARNING]- Collapsed callout
> Hidden content
The remarkObsidianCallouts() plugin inspects the first text child of every blockquote. If it matches the specified regex, it does the following:
- Extract the callout type (such as
NOTE,TIP,WARNING,ERROR, etc.), the fold flag (+,-, or none), and the custom title. - For foldable callouts (
+or-), it converts the node tagName into<details>, sets theopenproperty if+is present, and prepends a<summary>element. - For standard callouts, it converts the node into a
<div>withclass="obsidian-callout callout-{type}". - It attaches an SVG icon based on the callout type.
Theming
To support light and dark theme switching, I configured dual themes in Shiki:
async function getHighlighterInstance() {
  if (!highlighterPromise) {
    highlighterPromise = createHighlighterCore({
      themes: [catppuccinMocha, catppuccinLatte],
      langs: [
        js,
        ts,
        html,
        css,
        json,
        markdown,
        bash,
        sql,
        python,
        go,
        rust,
        yaml,
      ],
      engine: createJavaScriptRegexEngine(),
    });
  }
  return highlighterPromise;
}
Shiki injects both --shiki-dark and --shiki-light CSS variables onto each token, and src/styles/global.css handles the switch using [data-theme="light"] and [data-theme="dark"] selectors, just as the rest of the site.
Handling R2 Media Consistency and Orphan Detection
To manage files uploaded to Cloudflare R2, src/lib/markdown.ts exports two helper functions:
extractMediaReferences()collects all filenames from embeds and standard media links.replaceMediaReferences()updates all embed and link occurrences when a media asset is renamed in the admin dashboard.
When saving or deleting a post, the admin dashboard compares initial and current media references, queries the /api/admin/media/orphans API endpoint, and prompts to clean up unreferenced files in storage.
Tagging Posts
To simplify filtering of posts by tags, I modeled them as a relational many-to-many relationship in Cloudflare D1. Since I am using Drizzle ORM, it just feels like I'm writing with SQLModel but in Typescript.
export const posts = sqliteTable(
  "posts",
  {
    id: text("id").primaryKey(),
    slug: text("slug").notNull().unique(),
    title: text("title").notNull(),
    description: text("description"),
    content: text("content").notNull(),
    status: text("status", { enum: ["draft", "published"] })
      .notNull()
      .default("draft"),
    created_at: integer("created_at", { mode: "timestamp_ms" }).notNull(),
    updated_at: integer("updated_at", { mode: "timestamp_ms" }).notNull(),
    published_at: integer("published_at", { mode: "timestamp_ms" }),
  },
  (t) => [
    index("posts_status_published_at_idx").on(t.status, t.published_at),
    index("posts_updated_at_idx").on(t.updated_at),
  ],
);

export const tags = sqliteTable("tags", {
  id: text("id").primaryKey(),
  name: text("name").notNull().unique(),
  slug: text("slug").notNull().unique(),
  created_at: integer("created_at", { mode: "timestamp_ms" }).notNull(),
});

export const post_tags = sqliteTable(
  "post_tags",
  {
    post_id: text("post_id")
      .notNull()
      .references(() => posts.id, { onDelete: "cascade" }),
    tag_id: text("tag_id")
      .notNull()
      .references(() => tags.id, { onDelete: "cascade" }),
  },
  (t) => [
    primaryKey({ columns: [t.post_id, t.tag_id] }),
    index("post_tags_tag_id_idx").on(t.tag_id),
  ],
);
Media Library
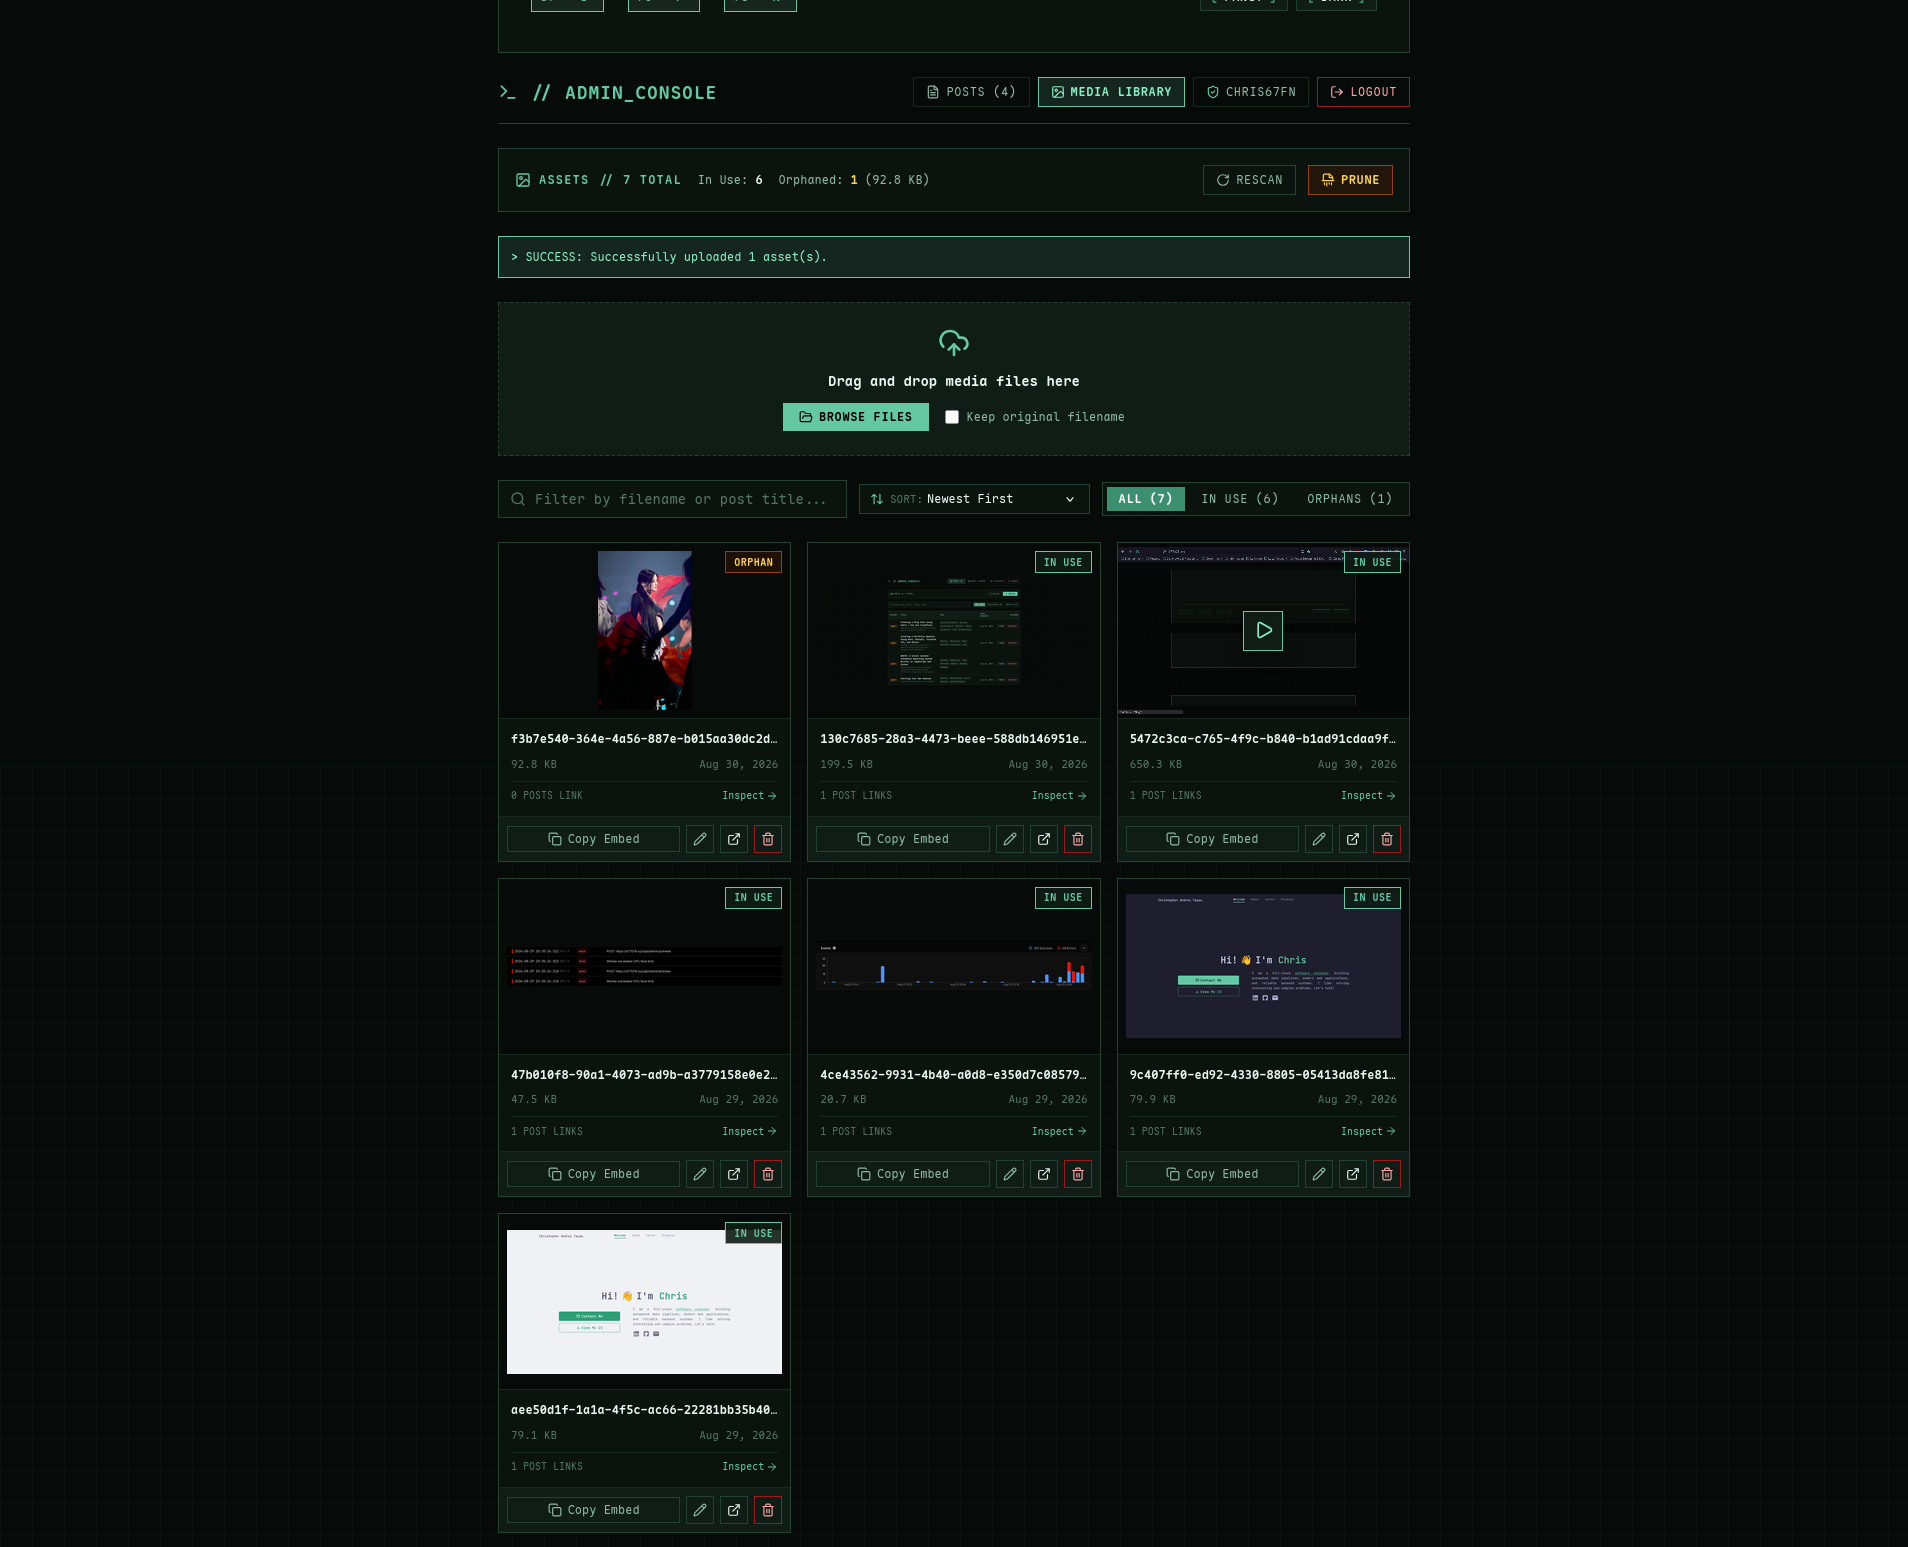
Media assets are stored in Cloudflare R2 with metadata indexed in D1. When a media file is uploaded, the server calculates its SHA-256 hash using the Web Crypto API. If a matching hash already exists, the database references the existing file rather than duplicating the file in R2.
Media uploads use XMLHttpRequest progress events to display live percentage bars. The media endpoint in src/pages/media/[filename].ts supports HTTP Range requests, so that we can seek videos and audio playback.
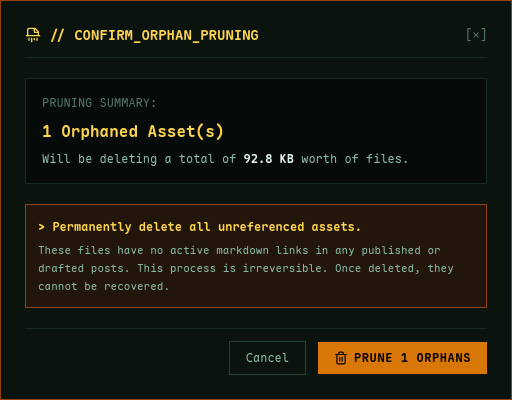
There is also a media library tab that allows me to view all attachments in my posts. Cloudflare's R2 object store has a generous free tier, but I worry that in the long run I might have to opt-in for the paid plan. So to future-proof my site, I went ahead and implemented a "Prune" button that will delete all unused (orphaned) files.
Securing Administration Endpoints
When I was planning for the security of my site, I thought "Why write authentication code when Cloudflare Zero Trust (Access) exists?" I tried setting up Zero Trust policies in /admin and select /api endpoints, but as it is my first time diving into Cloudflare's authentication/security access solution, I wasn't able to implement it the first time quickly. Maybe I was just tired since I was coding at 3 AM, but I did not understand the documentation at the time.
Because I just want my blog site to work™, I scrapped Zero Trust and built a native authentication system instead. Now, we have signed JWTs stored in Secure cookies. I also used the otpauth library to generate TOTP secrets, so when the 2FA setting is enabled, the admin page will require both the password and a 6-digit one-time PIN code.
Pre-Deployment
Before deploying, I validated the entire application locally:
# Run unit, auth, markdown, and database operation tests
bun test

# Build and preview locally
bun run dev
I also manually tested post creation, file uploads, post viewing, and a bunch of edge cases.
Deployment
Now that I've implemented all the important features, I can now deploy it to production!
First, I pushed the newly-added commits to GitHub so that Cloudflare can deploy it automatically.
git checkout main
git merge dev # Merge changes from `dev` to `main`
git push
Looking at the Deployments tab, my first deployment failed.
A request to the Cloudflare API (/accounts/********************************
/workers/scripts/website-677078-xyz/versions) failed.
- Your Worker exceeded the size limit of 3 MiB. Please upgrade to a paid plan to deploy Workers up to 10 MiB. https://dash.cloudflare.com/********************************
/workers/plans [code: 10027]
To learn more about this error, visit: https://developers.cloudflare.com/workers/platform/limits/#worker-size
Here are the 5 largest dependencies included in your script:

  - dist/server/chunks/components_Cmn3yecV.mjs - 7254.29 KiB
  - dist/server/chunks/markdown_B6cDT1Y4.mjs - 3386.18 KiB
  - dist/server/chunks/entrypoints_ofS1heed.mjs - 412.19 KiB
  - dist/server/chunks/sequence_DWLtcCFg.mjs - 285.24 KiB
  - dist/server/chunks/db_B0gAKdkf.mjs - 88.25 KiB

If these are unnecessary, consider removing them
What is components_Cmn3yecV.mjs, and why is it almost 8MB? During development, Vite serves modules on-demand. In production, Astro bundled the entire @iconify-json/lucide dataset for callout icons, along with syntax highlighters for all languages I enabled. Because of this, the production Worker bundle exceeded the worker size limit. The culprit for this is a single line in markdown.ts: import lucideIcons from "@iconify-json/lucide/icons.json";.
// ...
import { getIconData, iconToSVG } from "@iconify/utils";
import lucideIcons from "@iconify-json/lucide/icons.json";

const CALLOUT_LUCIDE_MAP: Record<string, string> = {
  note: "info",
  seealso: "info",
  // 24 more records...
  quote: "quote",
  cite: "quote",
};

function getCalloutIcon(type: string): string {
  const iconName = CALLOUT_LUCIDE_MAP[type] || "info";
  const iconData = getIconData(lucideIcons as any, iconName);
  if (!iconData) {
    return '<svg xmlns="http://www.w3.org/2000/svg" width="16" height="16" viewBox="0 0 24 24" fill="none" stroke="currentColor" stroke-width="2" stroke-linecap="round" stroke-linejoin="round" class="lucide-callout-icon"><circle cx="12" cy="12" r="10"/><path d="M12 16v-4"/><path d="M12 8h.01"/></svg>';
  }

  const renderData = iconToSVG(iconData, {
    width: "16",
    height: "16",
  });

  const attributes = Object.entries(renderData.attributes)
    .map(([key, val]) => `${key}="${val}"`)
    .join(" ");

  return `<svg xmlns="http://www.w3.org/2000/svg" class="lucide-callout-icon" ${attributes}>${renderData.body}</svg>`;
}
This line imported the whole Lucide icon pack just for the Obsidian callouts support. To fix this, I moved the necessary SVG icons to /icons/callouts.svg and shown only the appropriate icon using an <svg> tag.
export function renderSVG(
  iconName: string,
  options?: {
    width?: number | string;
    height?: number | string;
    className?: string;
  },
): string {
  const width = options?.width || "16";
  const height = options?.height || "16";
  const classAttr = options?.className ? ` class="${options.className}"` : "";

  return `<svg xmlns="http://www.w3.org/2000/svg"${classAttr} width="${width}" height="${height}" viewBox="0 0 24 24" aria-hidden="true"><use href="/icons/callouts.svg#${iconName}"></use></svg>`;
}
Now, the client (browser) retrieves the callouts.svg file from the edge, and we don't have to add icons to the bundle and increase the worker size.
Time for deployment attempt #2...
After waiting for a few minutes, I checked the Cloudflare dashboard to verify that the latest version of the site has been deployed. I also double-checked that D1 and R2 instances are provisioned. Once I've confirmed that they exist, I started applying the migrations and created a new admin account.
bun run wrangler d1 migrations apply website_677078_xyz_db --remote
bun run seed:admin <username> <password> --remote
Post-Deployment
After a few hours of its release to production, I woke up. I was so excited that instead of making my coffee first, I immediately tried out my new blog site. While trying to write my article on how I created my portfolio website, I noticed something. The preview pane while editing posts shows that it failed to render my Markdown content, and the "Save Draft" button throws an error about JSON parsing. I looked at logs. We are getting errors.

I looked at the Cloudflare Observability logs of my Worker where the site is running, and saw these error logs:

This is not good. We are getting a Worker exceeded CPU time limit error in our /api/admin/preview endpoint.
For Cloudflare accounts in the Free tier, we are limited to 10ms CPU time. In the v1.0 of the production code, we have the Markdown rendering in the server side.
import type { APIRoute } from "astro";
import { renderMarkdown } from "../../../lib/markdown";

export const prerender = false;

export const POST: APIRoute = async (context) => {
  try {
    const body = (await context.request.json()) as any;
    const markdown = typeof body?.markdown === "string" ? body.markdown : "";
    const html = await renderMarkdown(markdown);

    return new Response(JSON.stringify({ html }), {
      status: 200,
      headers: { "Content-Type": "application/json" },
    });
  } catch (error: any) {
    return new Response(
      JSON.stringify({
        error: error?.message || "Failed to render markdown preview",
      }),
      {
        status: 500,
        headers: { "Content-Type": "application/json" },
      },
    );
  }
};
If a post has a lot of content (~2,000 words), it takes more than 10ms for Shiki to parse the whole text, resulting to the error we saw earlier. The first solution I thought of is to just "optimize" the parser. Maybe my implementation of the Remark plugins are inefficient? Maybe I used the wrong library? But then I realized that I can solve this with a much simpler solution: let the client render the Markdown content.
It turns out that the actual inefficient part of the site is where the rendering process is performed. Right now, when typing on the editor, it waits for the user to stop typing for 250ms. When it detects that the user had stopped typing, it sends a POST request to /api/admin/preview with the whole Markdown content. The server API then processes the input and generates an HTML version of it, and sends it back to the client. This happens hundreds of times while editing a post.
function fetchPreview() {
  if (previewTimeout) clearTimeout(previewTimeout);
  isRenderingPreview.value = true;
  previewTimeout = setTimeout(async () => {
    try {
      const res = await fetch("/api/admin/preview", {
        method: "POST",
        headers: { "Content-Type": "application/json" },
        body: JSON.stringify({ markdown: content.value }),
      });
      const data: any = await res.json();
      previewHtml.value =
        data.html || '<p class="text-[var(--text-muted)]">> Empty document</p>';
    } catch {
      previewHtml.value =
        '<p class="text-(--status-error-text)">> Failed to render preview</p>';
    } finally {
      isRenderingPreview.value = false;
    }
  }, 250);
}
Solving the current problem with Cloudflare Workers is very simple, as it turned out. In the new PostEditor.vue code, the client now directly calls the renderMarkdown() function instead of passing it to /api/admin/preview and letting the server call the same function. With this one simple refactor, the editor is now blazingly fast again! 🔥
Conclusion
Building this site from scratch took more effort than using an existing static site generator like Jekyll or Quartz, but I got the exact setup I wanted. The public pages load fast, and the admin panel lets me write in Obsidian syntax without manual conversion.
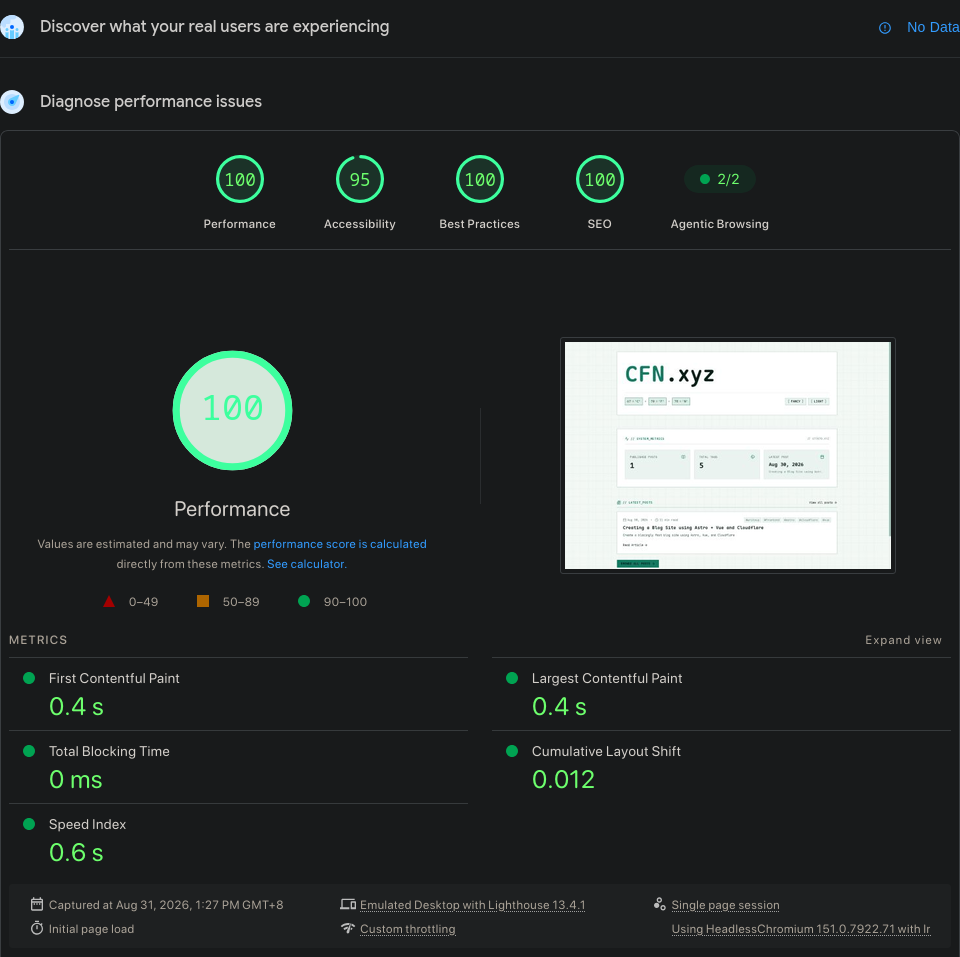
To be honest, I thought deploying to Cloudflare Workers will let me do whatever I want for my site, but it instead forced me to respect edge constraints early. The 3 MB bundle limit and the 10 ms CPU limit on the free tier made made me optimize the site before deploying to production. In both cases, the fix came down to architecture. This is why a good system architecture is preferred over ones that just work.
The site is far from perfect, but I had fun making this and I learned a lot of things during the time I spent in this project.